🤔 What is the Document Object Model (DOM)?
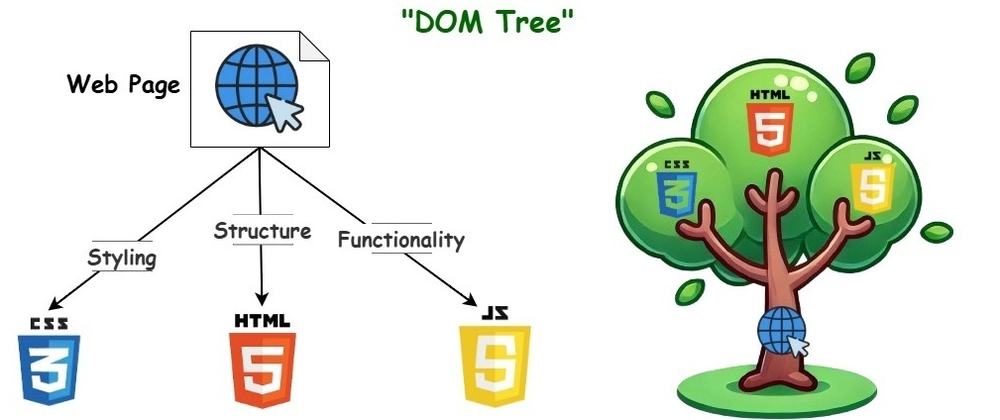
The DOM (Document Object Model) is like a live blueprint of your HTML webpage that JavaScript can read and modify. Think of it this way:
🏠 House Analogy: If your HTML is like the blueprint of a house, the DOM is like the actual house where you can: • Open and close doors (show/hide elements) • Change the paint color (modify styles) • Move furniture around (rearrange elements) • Install new fixtures (add new elements)
� Phone Book Analogy: The DOM is like a phone book where: • Every person (HTML element) has a unique address (ID or class) • You can look up anyone by name (querySelector) • You can call them and ask them to do something (event listeners) • You can update their information (change content)
Simple Definition: The DOM lets JavaScript talk to your HTML elements and change them while the page is running! 🚀
🌳 What is the DOM Tree?
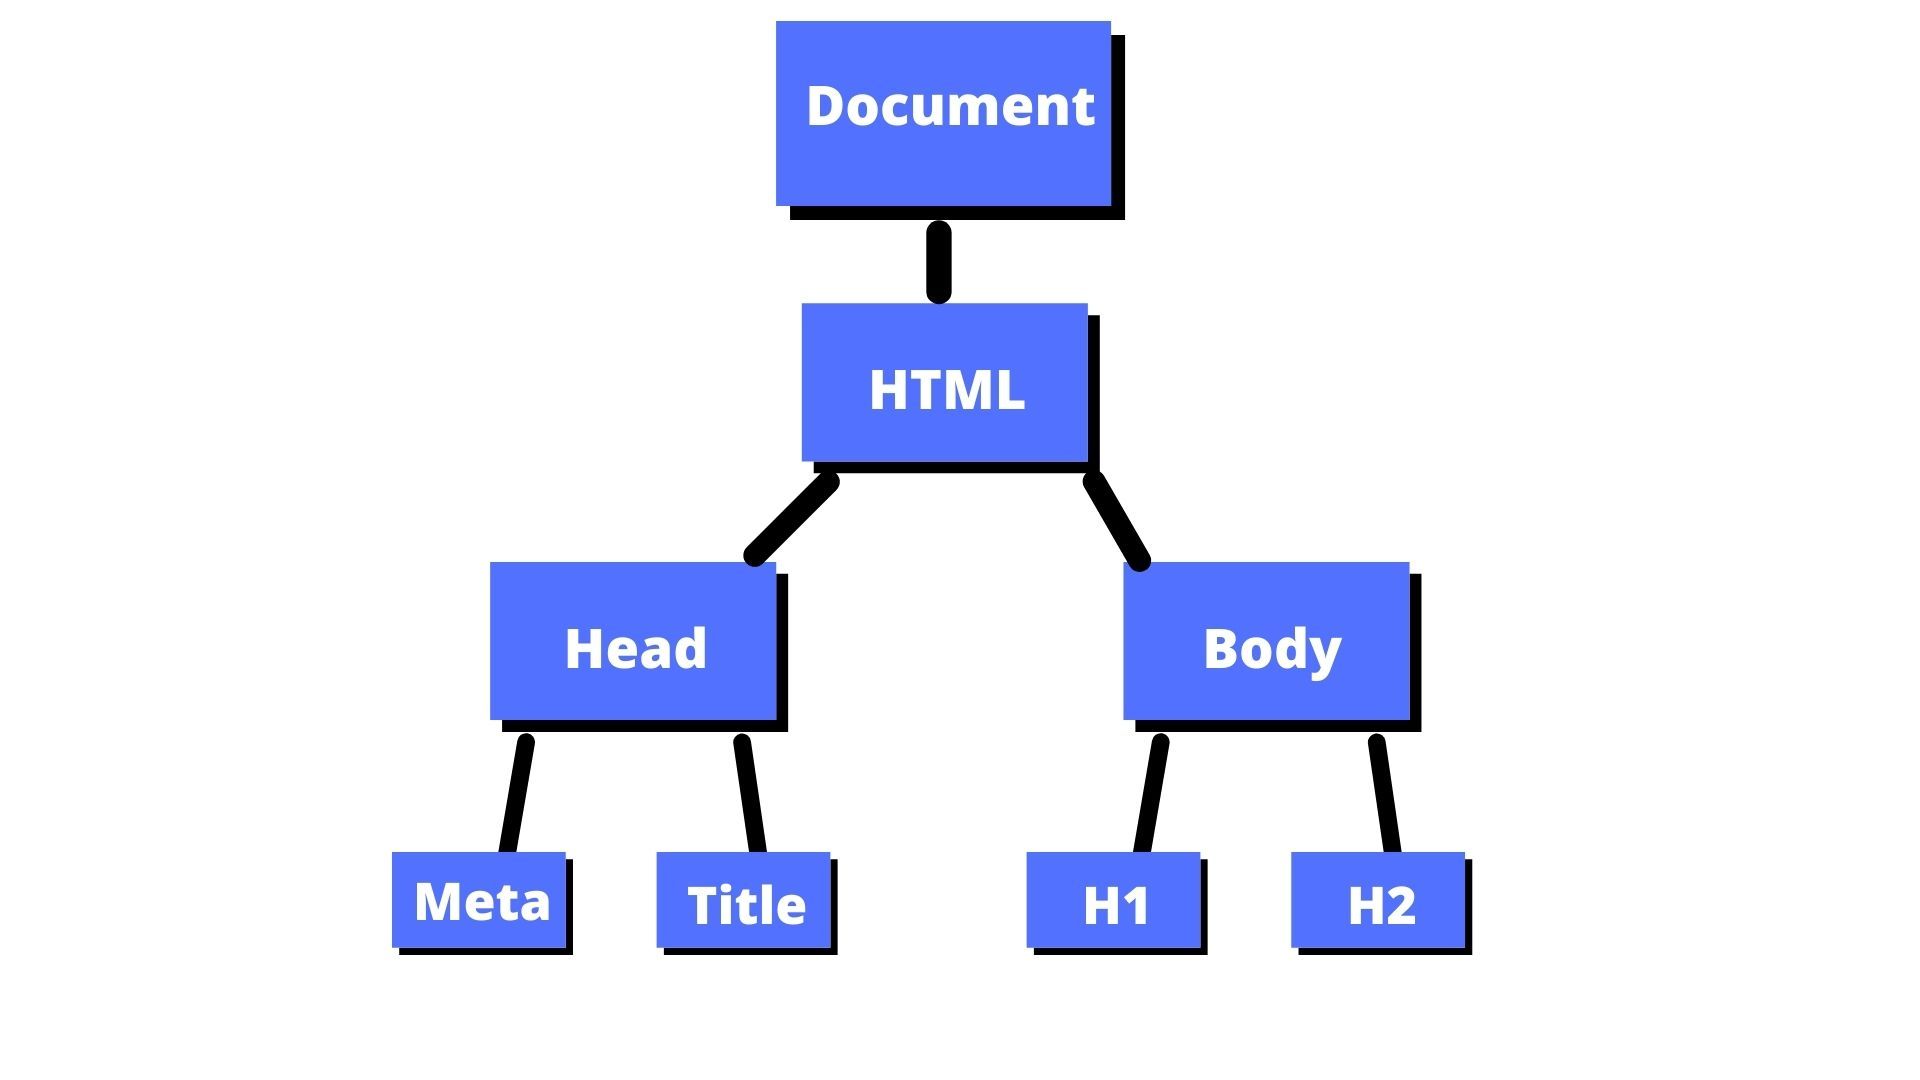
Every HTML document creates a tree structure called the DOM Tree. Just like a family tree, it shows how elements are related to each other:
Every HTML document creates a tree structure called the DOM Tree. Just like a family tree, it shows how elements are related to each other:
1
2
3
4
5
6
7
8
9
10
11
12
13
<!DOCTYPE html>
<html>                    <!-- Root (Grandparent) -->
  <head>                 <!-- Parent of title -->
    <title>My Page</title>  <!-- Child of head -->
  </head>
  <body>                 <!-- Parent of h1, p, div -->
    <h1>Welcome</h1>     <!-- Child of body, Sibling of p and div -->
    <p>Hello World</p>   <!-- Child of body, Sibling of h1 and div -->
    <div>                <!-- Child of body, Parent of button -->
      <button>Click</button>  <!-- Child of div -->
    </div>
  </body>
</html>👨👩👧👦 Family Relationship: Just like in families:
• Parents contain children (<body> contains <h1>, <p>, etc.)
• Children belong to parents (<button> belongs to <div>)
• Siblings are at the same level (<h1> and <p> are siblings)
🎯 Step 1: Your First DOM Interaction (Super Simple!)
Let's start with the absolute simplest example - just getting one element and changing its text:
1
2
3
4
5
6
7
8
9
10
11
12
13
14
15
16
17
18
19
20
<!DOCTYPE html>
<html>
<head>
  <title>My First DOM</title>
</head>
<body>
  <h1 id="myTitle">Hello World!</h1>
  <button onclick="changeTitle()">Click to Change Title</button>

  <script>
    function changeTitle() {
      // Step 1: Find the element
      const title = document.getElementById('myTitle');

      // Step 2: Change its text
      title.textContent = 'Title Changed! 🎉';
    }
  </script>
</body>
</html>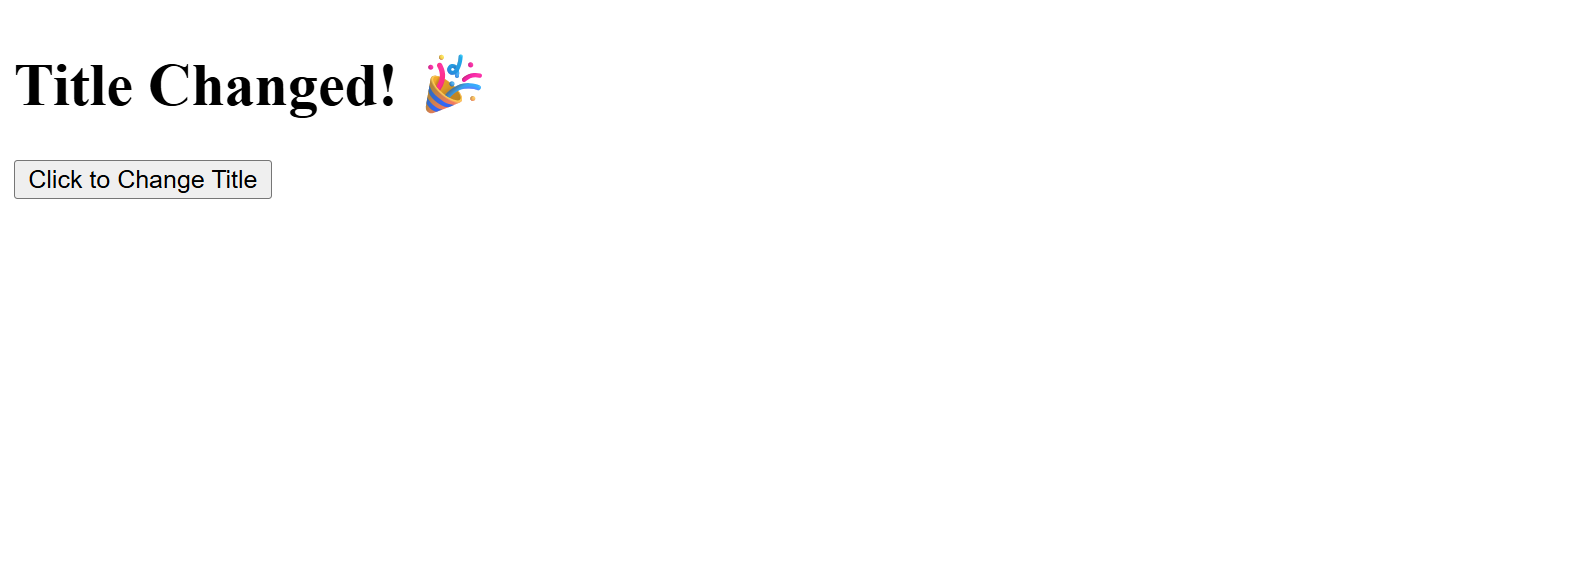
What's happening here?
• document.getElementById('myTitle') - Finds the element with ID 'myTitle'
• title.textContent = 'new text' - Changes what's written inside that element
• When you click the button, the title changes instantly!
🎯 Step 2: Reading What User Types
Now let's get what the user types in an input field:
1
2
3
4
5
6
7
8
9
10
11
12
13
14
15
16
17
18
19
20
21
22
23
24
25
26
27
28
29
<!DOCTYPE html>
<html>
<head>
  <title>Reading User Input</title>
</head>
<body>
  <h1>What's Your Name?</h1>
  <input type="text" id="nameInput" placeholder="Type your name here">
  <button onclick="sayHello()">Say Hello</button>

  <p id="greeting"></p>

  <script>
    function sayHello() {
      // Step 1: Find the input field
      const nameInput = document.getElementById('nameInput');

      // Step 2: Get what the user typed
      const userName = nameInput.value;

      // Step 3: Find where to show the message
      const greetingParagraph = document.getElementById('greeting');

      // Step 4: Show the personalized message
      greetingParagraph.textContent = 'Hello, ' + userName + '! 👋';
    }
  </script>
</body>
</html>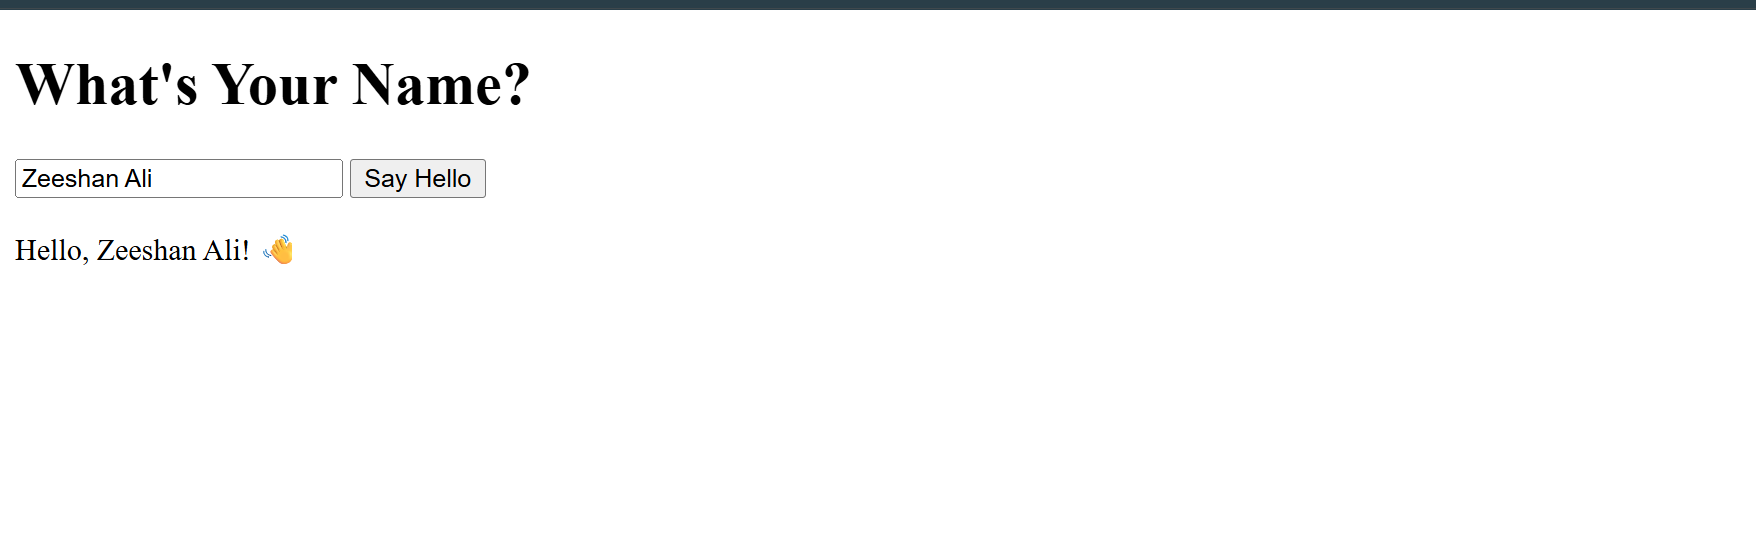
What's new here?
• nameInput.value - Gets what the user typed in the input field
• We use the user's name to create a personalized message
• The greeting appears in the paragraph below
🎯 Step 3: Simple Calculator (Adding Two Numbers)
Let's make a basic calculator that adds two numbers:
1
2
3
4
5
6
7
8
9
10
11
12
13
14
15
16
17
18
19
20
21
22
23
24
25
26
27
28
29
30
31
<!DOCTYPE html>
<html>
<head>
  <title>Simple Calculator</title>
</head>
<body>
  <h1>Simple Calculator</h1>

  <p>First Number: <input type="number" id="num1" value="5"></p>
  <p>Second Number: <input type="number" id="num2" value="3"></p>

  <button onclick="addNumbers()">Add Them!</button>

  <h2 id="result">Result will appear here</h2>

  <script>
    function addNumbers() {
      // Step 1: Get the two numbers
      const firstNum = document.getElementById('num1').value;
      const secondNum = document.getElementById('num2').value;

      // Step 2: Add them (convert to numbers first)
      const sum = Number(firstNum) + Number(secondNum);

      // Step 3: Show the result
      const resultElement = document.getElementById('result');
      resultElement.textContent = firstNum + ' + ' + secondNum + ' = ' + sum;
    }
  </script>
</body>
</html>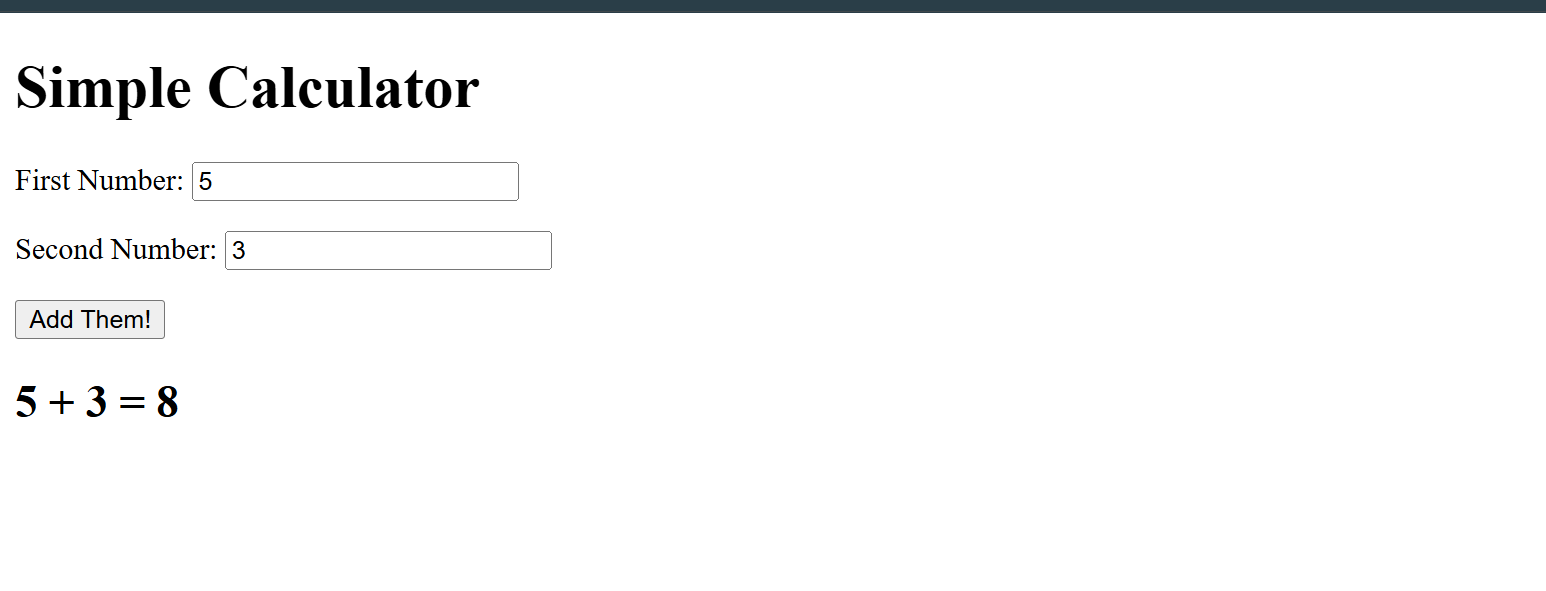
What's new here?
• We get values from TWO input fields
• Number() converts text to actual numbers so we can do math
• We create a nice result message showing the calculation
🎯 Step 4: Making Things Colorful (Changing Styles)
Let's learn how to change colors and styles:
1
2
3
4
5
6
7
8
9
10
11
12
13
14
15
16
17
18
19
20
21
22
23
24
25
26
27
28
29
30
31
32
33
34
35
36
<!DOCTYPE html>
<html>
<head>
  <title>Changing Colors</title>
</head>
<body>
  <h1 id="colorTitle">I Can Change Colors!</h1>

  <button onclick="makeRed()">Make Red</button>
  <button onclick="makeBlue()">Make Blue</button>
  <button onclick="makeGreen()">Make Green</button>
  <button onclick="makeBig()">Make Big</button>

  <script>
    function makeRed() {
      const title = document.getElementById('colorTitle');
      title.style.color = 'red';
    }

    function makeBlue() {
      const title = document.getElementById('colorTitle');
      title.style.color = 'blue';
    }

    function makeGreen() {
      const title = document.getElementById('colorTitle');
      title.style.color = 'green';
    }

    function makeBig() {
      const title = document.getElementById('colorTitle');
      title.style.fontSize = '50px';
    }
  </script>
</body>
</html>
What's new here?
• element.style.color = 'red' - Changes the text color
• element.style.fontSize = '50px' - Changes the size of the text
• Each button does one simple thing when clicked
🎯 Step 5: Show and Hide Things
Learn how to make elements appear and disappear:
1
2
3
4
5
6
7
8
9
10
11
12
13
14
15
16
17
18
19
20
21
22
23
24
25
26
27
28
29
30
31
32
33
34
35
36
<!DOCTYPE html>
<html>
<head>
  <title>Show and Hide</title>
  <style>
    .secret-message {
      background-color: lightyellow;
      padding: 20px;
      border: 2px dashed orange;
      margin: 10px 0;
    }
  </style>
</head>
<body>
  <h1>Magic Show and Hide!</h1>

  <button onclick="showMessage()">Show Secret</button>
  <button onclick="hideMessage()">Hide Secret</button>

  <div id="secretDiv" class="secret-message" style="display: none;">
    🎉 This is the secret message! You found it! 🎉
  </div>

  <script>
    function showMessage() {
      const secret = document.getElementById('secretDiv');
      secret.style.display = 'block';
    }

    function hideMessage() {
      const secret = document.getElementById('secretDiv');
      secret.style.display = 'none';
    }
  </script>
</body>
</html>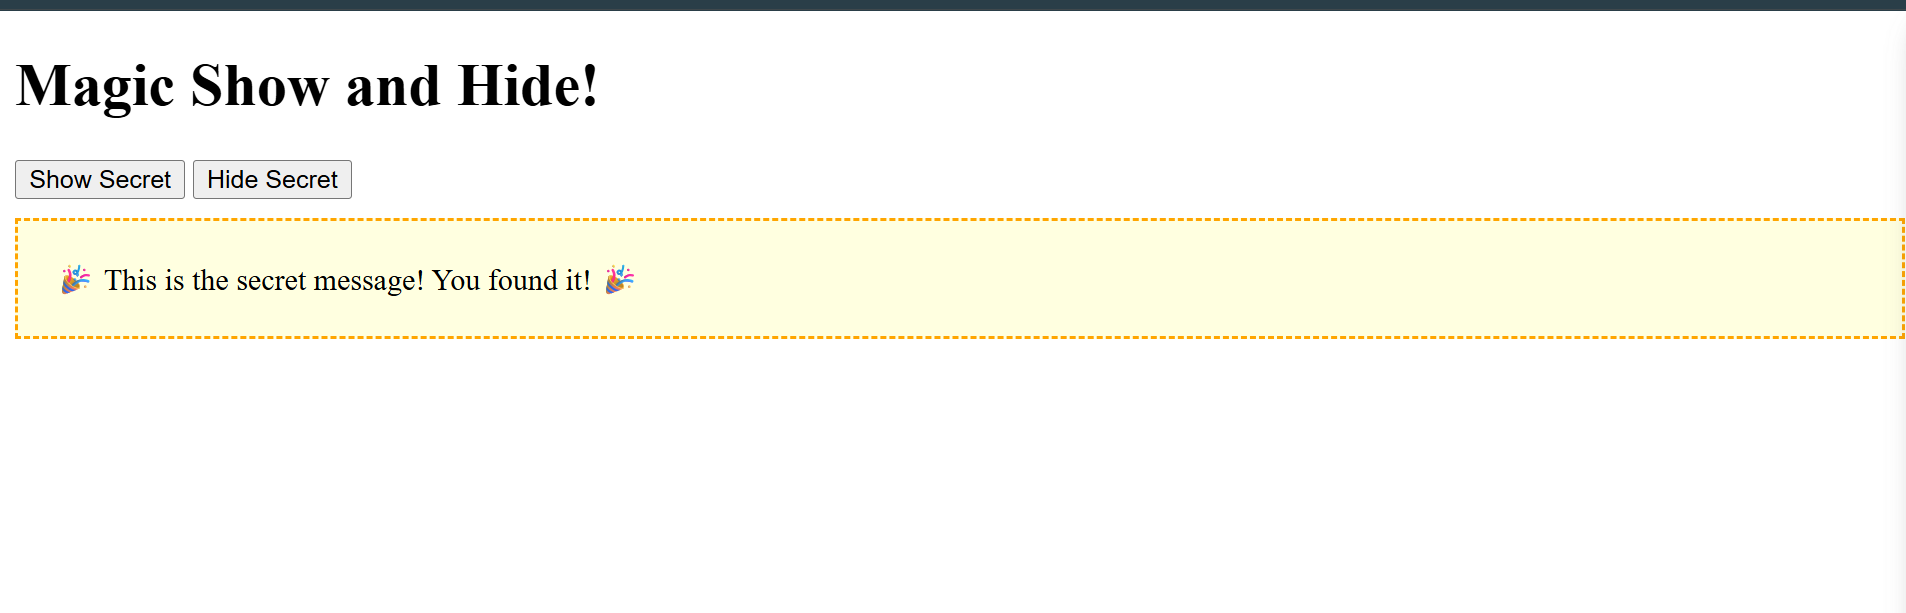
What's new here?
• element.style.display = 'block' - Makes the element visible
• element.style.display = 'none' - Makes the element invisible
• The element starts hidden with style="display: none;" in the HTML
🎯 Step 6: Creating New Elements
Now let's create brand new HTML elements with JavaScript:
1
2
3
4
5
6
7
8
9
10
11
12
13
14
15
16
17
18
19
20
21
22
23
24
25
26
27
28
29
30
31
32
33
34
35
36
37
38
39
40
41
42
43
44
45
46
47
48
49
50
51
52
53
54
<!DOCTYPE html>
<html>
<head>
  <title>Creating Elements</title>
  <style>
    .new-item {
      background-color: lightgreen;
      padding: 10px;
      margin: 5px 0;
      border-radius: 5px;
    }
  </style>
</head>
<body>
  <h1>Element Creator</h1>

  <button onclick="addParagraph()">Add New Paragraph</button>
  <button onclick="addButton()">Add New Button</button>

  <div id="container">
    <p>Original content here</p>
  </div>

  <script>
    function addParagraph() {
      // Step 1: Create a new paragraph element
      const newParagraph = document.createElement('p');

      // Step 2: Add text to it
      newParagraph.textContent = 'I am a new paragraph! Created at ' + new Date().toLocaleTimeString();

      // Step 3: Add a CSS class for styling
      newParagraph.className = 'new-item';

      // Step 4: Add it to the container
      const container = document.getElementById('container');
      container.appendChild(newParagraph);
    }

    function addButton() {
      // Create a new button
      const newButton = document.createElement('button');
      newButton.textContent = 'I am new button!';
      newButton.onclick = function() {
        alert('New button was clicked!');
      };

      // Add it to the container
      const container = document.getElementById('container');
      container.appendChild(newButton);
    }
  </script>
</body>
</html>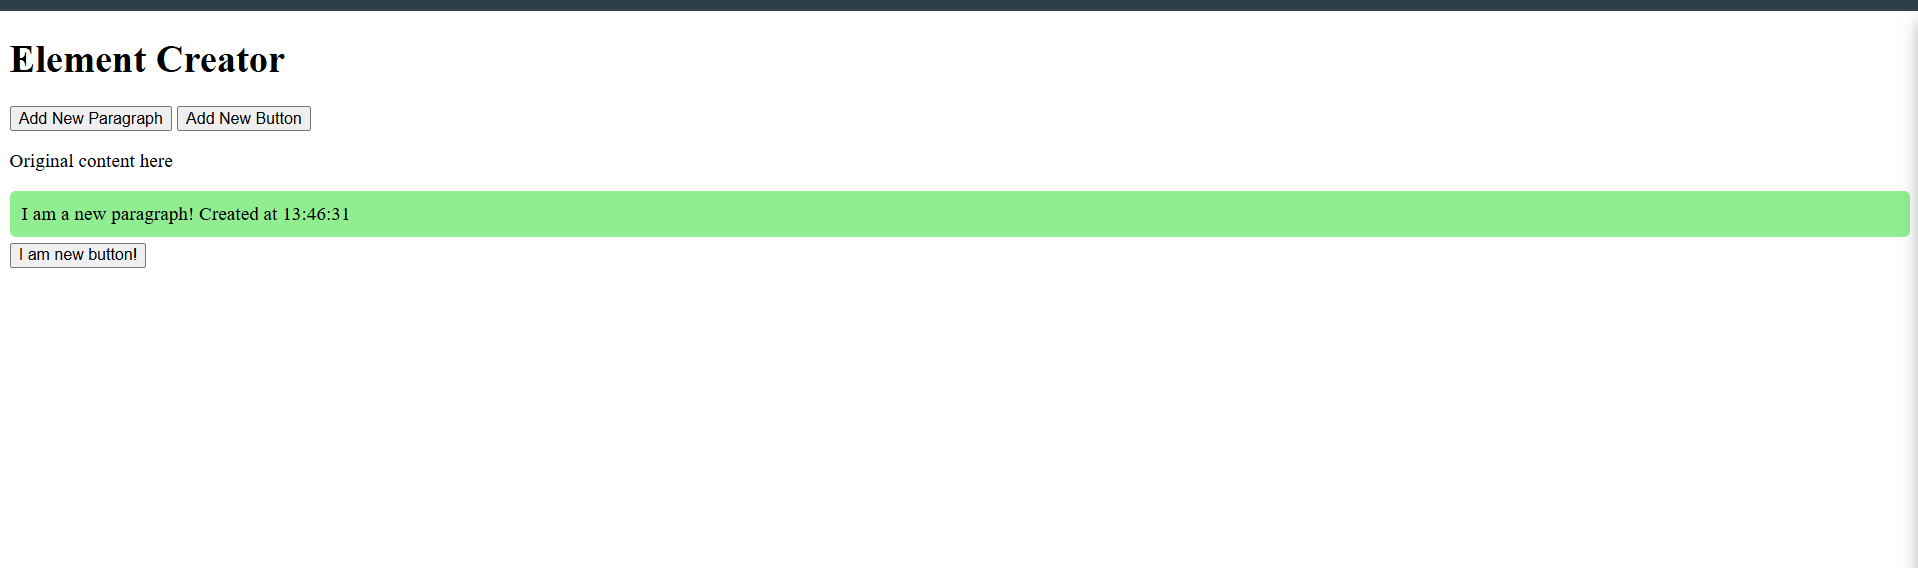
What's new here?
• document.createElement('p') - Creates a new paragraph element
• newElement.textContent = 'text' - Adds text to the new element
• container.appendChild(newElement) - Adds the new element to the page
• We can even add click actions to new buttons!
🎯 Step 7: Mini Project - Personal Greeting Card
Let's combine everything we've learned so far into a fun mini-project:
1
2
3
4
5
6
7
8
9
10
11
12
13
14
15
16
17
18
19
20
21
22
23
24
25
26
27
28
29
30
31
32
33
34
35
36
37
38
39
40
41
42
43
44
45
46
47
48
49
50
51
52
53
54
55
56
57
58
59
60
61
62
63
64
65
66
67
68
69
70
71
72
73
74
75
76
77
78
79
80
81
82
83
84
85
86
87
88
89
90
91
92
93
94
95
96
97
98
99
100
101
102
103
104
105
106
107
108
109
110
111
112
113
114
115
116
<!DOCTYPE html>
<html>
<head>
  <title>Personal Greeting Card</title>
  <style>
    body {
      font-family: Arial, sans-serif;
      background-color: #f0f8ff;
      padding: 20px;
    }

    .card {
      background-color: white;
      border-radius: 15px;
      padding: 30px;
      max-width: 500px;
      margin: 20px auto;
      box-shadow: 0 4px 8px rgba(0,0,0,0.1);
      text-align: center;
    }

    input {
      padding: 10px;
      margin: 10px;
      border: 2px solid #ddd;
      border-radius: 5px;
      font-size: 16px;
    }

    button {
      background-color: #4CAF50;
      color: white;
      padding: 12px 24px;
      border: none;
      border-radius: 5px;
      cursor: pointer;
      margin: 5px;
      font-size: 16px;
    }

    .greeting-message {
      background: linear-gradient(45deg, #ff6b6b, #4ecdc4);
      color: white;
      padding: 20px;
      border-radius: 10px;
      margin: 20px 0;
      display: none;
    }
  </style>
</head>
<body>
  <div class="card">
    <h1>🎉 Personal Greeting Card Maker</h1>

    <div>
      <input type="text" id="personName" placeholder="Enter your name">
      <input type="number" id="personAge" placeholder="Enter your age" min="1" max="120">
      <input type="text" id="favoriteColor" placeholder="Your favorite color">
    </div>

    <div>
      <button onclick="createCard()">Create My Card! 🎨</button>
      <button onclick="resetCard()">Reset</button>
    </div>

    <div id="greetingCard" class="greeting-message">
      <h2 id="cardTitle"></h2>
      <p id="cardMessage"></p>
      <div id="cardDetails"></div>
    </div>
  </div>

  <script>
    function createCard() {
      // Step 1: Get all the user inputs
      const name = document.getElementById('personName').value;
      const age = document.getElementById('personAge').value;
      const color = document.getElementById('favoriteColor').value;

      // Step 2: Check if user filled everything
      if (!name || !age || !color) {
        alert('Please fill in all fields! 😊');
        return;
      }

      // Step 3: Find the greeting card elements
      const card = document.getElementById('greetingCard');
      const title = document.getElementById('cardTitle');
      const message = document.getElementById('cardMessage');
      const details = document.getElementById('cardDetails');

      // Step 4: Create personalized content
      title.textContent = 'Hello, ' + name + '! 🌟';
      message.textContent = 'You are ' + age + ' years old and your favorite color is ' + color + '!';
      details.innerHTML = '✨ This card was made just for you! ✨';

      // Step 5: Change the card's background to their favorite color
      card.style.background = 'linear-gradient(45deg, ' + color + ', #4ecdc4)';

      // Step 6: Show the card
      card.style.display = 'block';
    }

    function resetCard() {
      // Clear all inputs
      document.getElementById('personName').value = '';
      document.getElementById('personAge').value = '';
      document.getElementById('favoriteColor').value = '';

      // Hide the card
      const card = document.getElementById('greetingCard');
      card.style.display = 'none';
    }
  </script>
</body>
</html>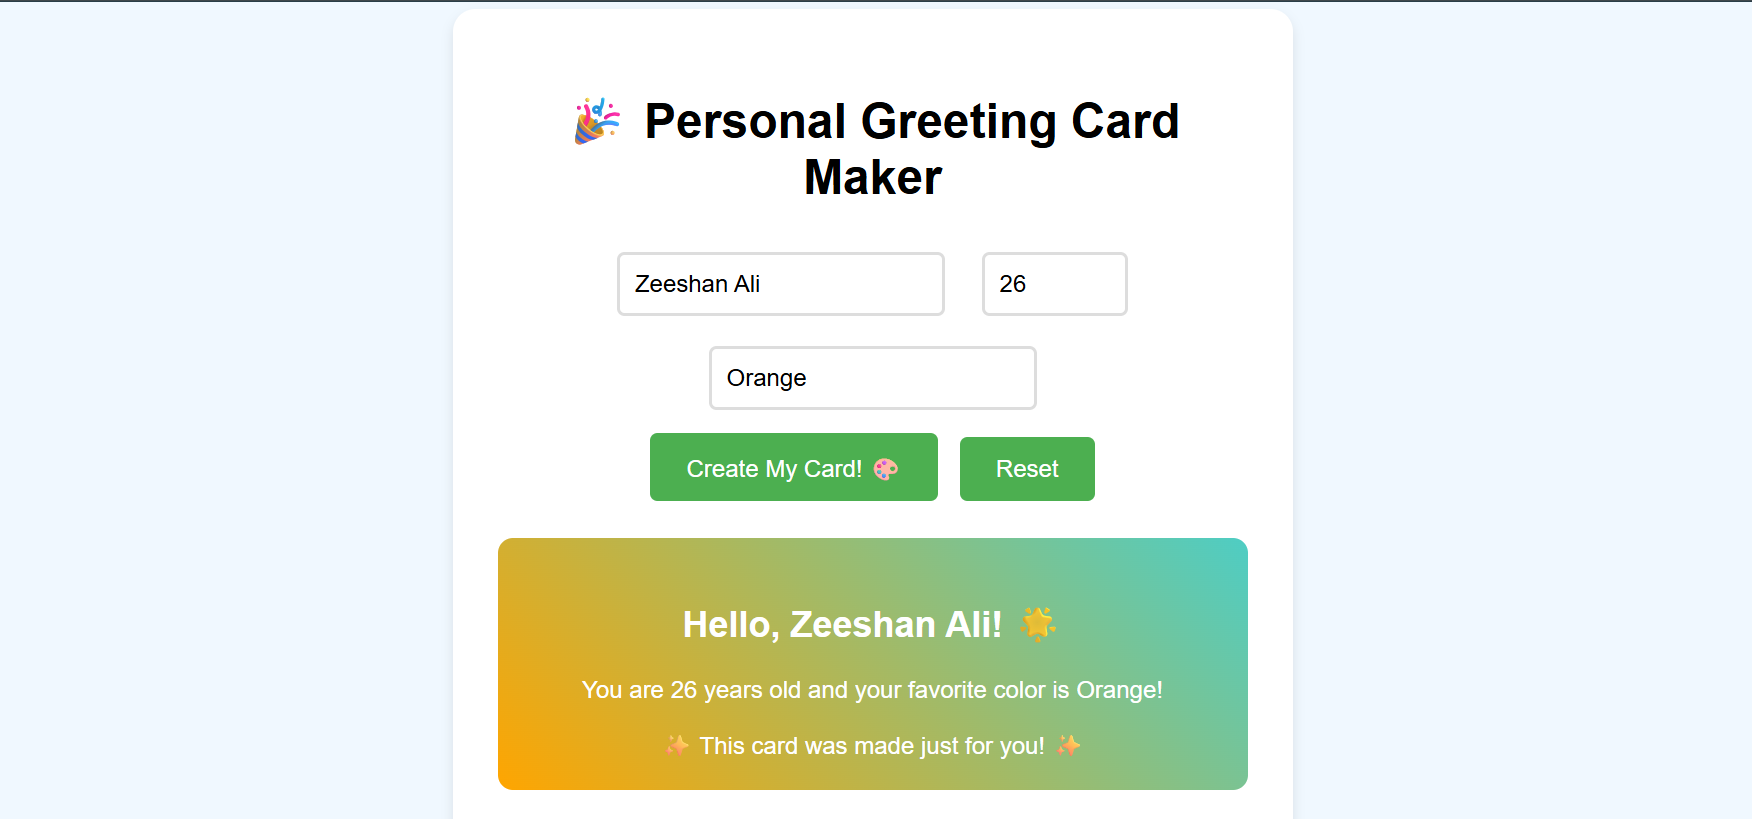
🎊 Congratulations! You just built your first interactive web app!
What you learned: • Getting values from multiple input fields • Checking if user filled in required information • Changing background colors dynamically • Showing and hiding elements based on user actions • Creating personalized content
🎯 Step 8: Building a Better Calculator
Now that you understand the basics, let's build a more advanced calculator:
1
2
3
4
5
6
7
8
9
10
11
12
13
14
15
16
17
18
19
20
21
22
23
24
25
26
27
28
29
30
31
32
33
34
35
36
37
38
39
40
41
42
43
44
45
46
47
48
49
50
51
52
53
54
55
56
57
58
59
60
61
62
63
64
65
66
67
68
69
70
71
72
73
74
75
76
77
78
79
80
81
82
83
84
85
86
87
88
89
90
91
92
93
94
95
96
97
98
99
100
101
102
103
104
105
106
107
108
109
110
111
112
113
114
115
116
117
118
119
120
121
122
123
124
125
126
127
128
129
130
131
132
133
134
135
136
137
138
139
140
141
142
143
144
145
146
147
148
149
150
151
152
153
154
155
156
157
158
159
160
161
162
163
164
165
166
167
168
169
170
171
172
173
174
175
176
177
178
179
180
181
182
183
184
185
186
187
188
189
190
191
192
193
194
195
196
197
198
199
200
201
202
203
204
205
206
207
208
209
210
211
212
213
214
215
216
217
218
<!DOCTYPE html>
<html>
<head>
  <title>Percentage Calculator</title>
  <style>
    body {
      font-family: Arial, sans-serif;
      max-width: 500px;
      margin: 50px auto;
      padding: 20px;
      background-color: #f0f8ff;
    }

    .calculator {
      background: white;
      padding: 30px;
      border-radius: 10px;
      box-shadow: 0 4px 8px rgba(0,0,0,0.1);
    }

    .input-group {
      margin-bottom: 15px;
    }

    label {
      display: block;
      margin-bottom: 5px;
      font-weight: bold;
      color: #333;
    }

    input {
      width: 100%;
      padding: 12px;
      border: 2px solid #ddd;
      border-radius: 5px;
      font-size: 16px;
      box-sizing: border-box;
    }

    input:focus {
      border-color: #4CAF50;
      outline: none;
    }

    button {
      background-color: #4CAF50;
      color: white;
      padding: 12px 30px;
      border: none;
      border-radius: 5px;
      cursor: pointer;
      font-size: 16px;
      width: 100%;
      margin: 10px 0;
    }

    button:hover {
      background-color: #45a049;
    }

    .result {
      background-color: #e8f5e8;
      padding: 20px;
      border-radius: 8px;
      border-left: 5px solid #4CAF50;
      margin-top: 20px;
      font-size: 18px;
    }

    .error {
      background-color: #ffe8e8;
      border-left-color: #ff4444;
      color: #cc0000;
    }
  </style>
</head>
<body>
  <div class="calculator">
    <h1>🧮 Percentage Calculator</h1>
    <p>Calculate percentages easily using DOM manipulation!</p>

    <!-- Input Fields -->
    <div class="input-group">
      <label for="number">Number:</label>
      <input type="number" id="number" placeholder="Enter a number (e.g., 25)">
    </div>

    <div class="input-group">
      <label for="total">Total:</label>
      <input type="number" id="total" placeholder="Enter total (e.g., 100)">
    </div>

    <div class="input-group">
      <label for="percentage">Percentage:</label>
      <input type="number" id="percentage" placeholder="Enter percentage (e.g., 20)">
    </div>

    <!-- Buttons -->
    <button onclick="calculatePercentage()">📊 Calculate Percentage</button>
    <button onclick="findPercentageOf()">🔢 Find X% of Number</button>
    <button onclick="clearAll()">🗑️ Clear All</button>

    <!-- Results Display -->
    <div id="result"></div>

    <!-- Live Input Display -->
    <div id="liveDisplay" style="margin-top: 20px; padding: 10px; background: #f9f9f9; border-radius: 5px;">
      <h4>📝 Live Input Values:</h4>
      <p>Number: <span id="liveNumber">-</span></p>
      <p>Total: <span id="liveTotal">-</span></p>
      <p>Percentage: <span id="livePercentage">-</span></p>
    </div>
  </div>

  <script>
    // Get references to DOM elements (cache them)
    const numberInput = document.getElementById('number');
    const totalInput = document.getElementById('total');
    const percentageInput = document.getElementById('percentage');
    const resultDiv = document.getElementById('result');
    const liveNumber = document.getElementById('liveNumber');
    const liveTotal = document.getElementById('liveTotal');
    const livePercentage = document.getElementById('livePercentage');

    // Function to calculate percentage (number/total * 100)
    function calculatePercentage() {
      // Get values from input fields
      const number = parseFloat(numberInput.value);
      const total = parseFloat(totalInput.value);

      // Validate inputs
      if (isNaN(number) || isNaN(total)) {
        showResult('❌ Please enter valid numbers for both Number and Total!', true);
        return;
      }

      if (total === 0) {
        showResult('❌ Total cannot be zero!', true);
        return;
      }

      // Calculate percentage
      const result = (number / total) * 100;

      // Display result using DOM
      showResult(`
        <h3>✅ Percentage Calculation</h3>
        <p><strong>${number}</strong> is <strong>${result.toFixed(2)}%</strong> of <strong>${total}</strong></p>
        <p><small>Formula: (${number} ÷ ${total}) × 100 = ${result.toFixed(2)}%</small></p>
      `);
    }

    // Function to find X% of a number
    function findPercentageOf() {
      // Get values from input fields
      const number = parseFloat(numberInput.value);
      const percentage = parseFloat(percentageInput.value);

      // Validate inputs
      if (isNaN(number) || isNaN(percentage)) {
        showResult('❌ Please enter valid numbers for both Number and Percentage!', true);
        return;
      }

      // Calculate X% of number
      const result = (percentage / 100) * number;

      // Display result using DOM
      showResult(`
        <h3>✅ Percentage of Number</h3>
        <p><strong>${percentage}%</strong> of <strong>${number}</strong> is <strong>${result.toFixed(2)}</strong></p>
        <p><small>Formula: (${percentage} ÷ 100) × ${number} = ${result.toFixed(2)}</small></p>
      `);
    }

    // Function to display results (DOM manipulation)
    function showResult(message, isError = false) {
      resultDiv.innerHTML = message;
      resultDiv.className = isError ? 'result error' : 'result';

      // Scroll to result
      resultDiv.scrollIntoView({ behavior: 'smooth' });
    }

    // Function to clear all inputs and results
    function clearAll() {
      numberInput.value = '';
      totalInput.value = '';
      percentageInput.value = '';
      resultDiv.innerHTML = '';
      updateLiveDisplay();
    }

    // Function to update live display (shows current input values)
    function updateLiveDisplay() {
      liveNumber.textContent = numberInput.value || '-';
      liveTotal.textContent = totalInput.value || '-';
      livePercentage.textContent = percentageInput.value || '-';
    }

    // Add event listeners for live updates
    numberInput.addEventListener('input', updateLiveDisplay);
    totalInput.addEventListener('input', updateLiveDisplay);
    percentageInput.addEventListener('input', updateLiveDisplay);

    // Allow Enter key to calculate
    document.addEventListener('keypress', function(event) {
      if (event.key === 'Enter') {
        calculatePercentage();
      }
    });

    // Initialize live display
    updateLiveDisplay();
  </script>
</body>
</html>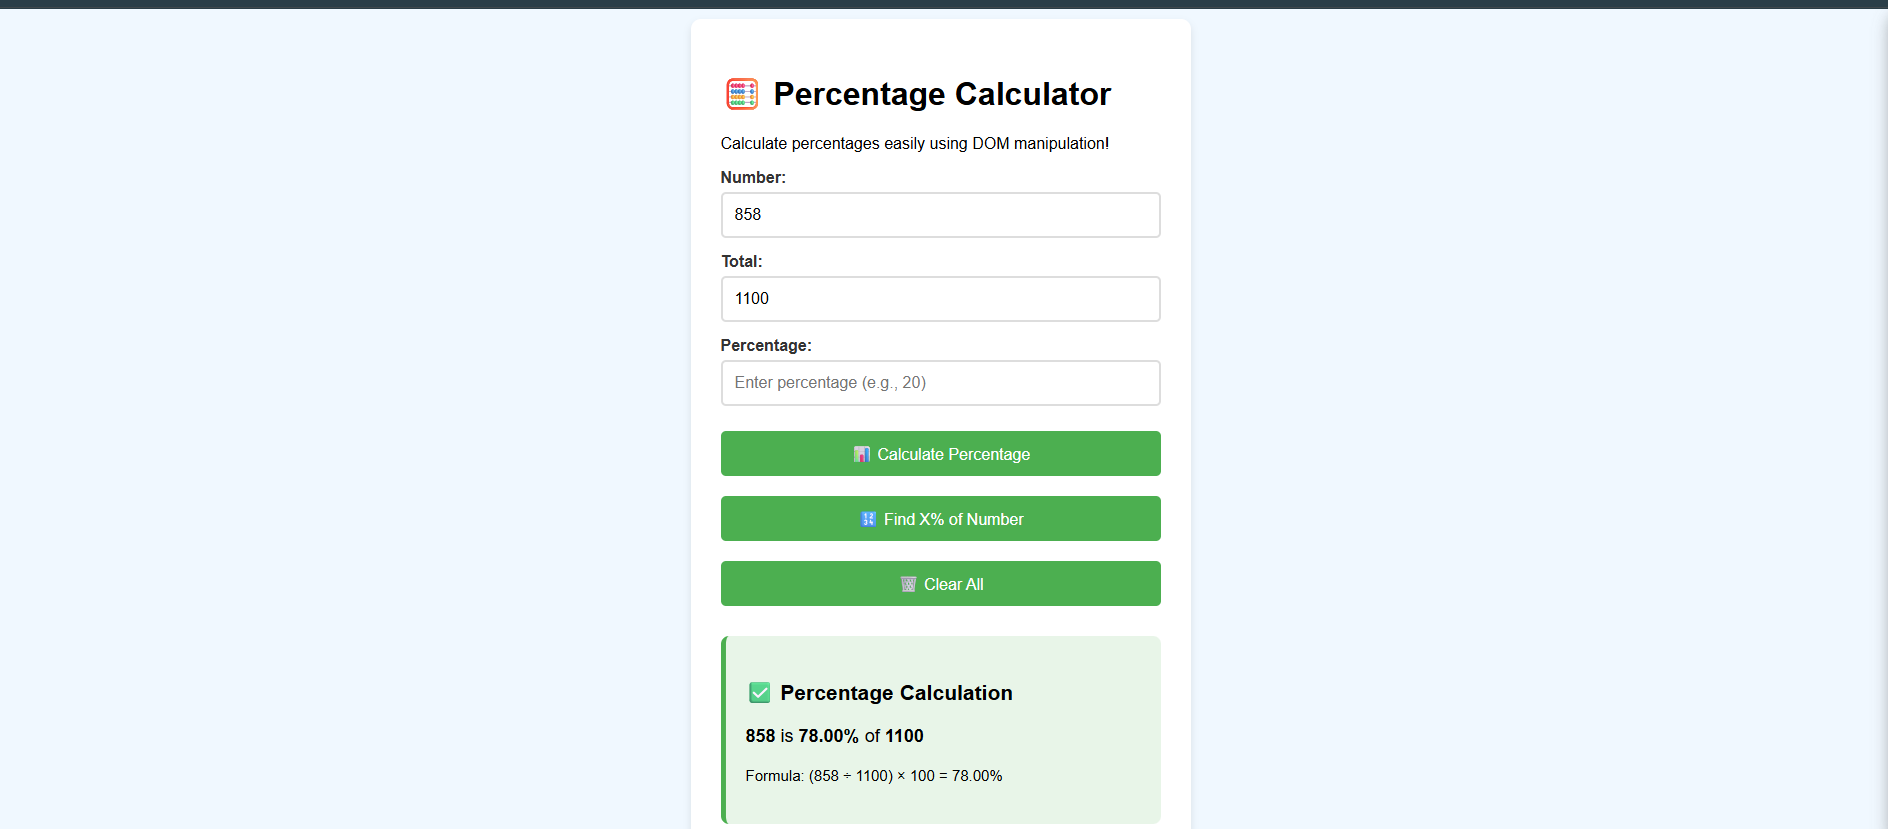
🎯 Step 9: Understanding Event Listeners (The Easy Way)
Event listeners are like waiters in a restaurant - they wait for something to happen (like a click) and then take action. Let's start simple:
1
2
3
4
5
6
7
8
9
10
11
12
13
14
15
16
17
18
19
20
21
22
23
24
25
26
27
28
29
30
31
32
33
34
35
36
37
38
39
40
41
42
43
44
45
46
47
48
49
50
51
52
53
54
55
56
57
58
59
60
61
<!DOCTYPE html>
<html>
<head>
  <title>Simple Event Listeners</title>
  <style>
    button {
      padding: 15px 30px;
      font-size: 18px;
      margin: 10px;
      border: none;
      border-radius: 8px;
      cursor: pointer;
    }

    .blue-btn { background-color: #007bff; color: white; }
    .green-btn { background-color: #28a745; color: white; }
    .red-btn { background-color: #dc3545; color: white; }

    #messageBox {
      background-color: #f8f9fa;
      padding: 20px;
      margin: 20px 0;
      border-radius: 10px;
      border: 2px dashed #6c757d;
    }
  </style>
</head>
<body>
  <h1>🎯 Simple Event Listeners Demo</h1>

  <button id="helloBtn" class="blue-btn">Say Hello</button>
  <button id="timeBtn" class="green-btn">Show Time</button>
  <button id="clearBtn" class="red-btn">Clear Message</button>

  <div id="messageBox">
    Click any button above to see what happens! 👆
  </div>

  <script>
    // Step 1: Find the elements we want to work with
    const helloButton = document.getElementById('helloBtn');
    const timeButton = document.getElementById('timeBtn');
    const clearButton = document.getElementById('clearBtn');
    const messageBox = document.getElementById('messageBox');

    // Step 2: Add event listeners (tell buttons what to do when clicked)
    helloButton.addEventListener('click', function() {
      messageBox.textContent = '👋 Hello! You clicked the Hello button!';
    });

    timeButton.addEventListener('click', function() {
      const currentTime = new Date().toLocaleTimeString();
      messageBox.textContent = '⏰ Current time is: ' + currentTime;
    });

    clearButton.addEventListener('click', function() {
      messageBox.textContent = 'Message cleared! Click another button.';
    });
  </script>
</body>
</html>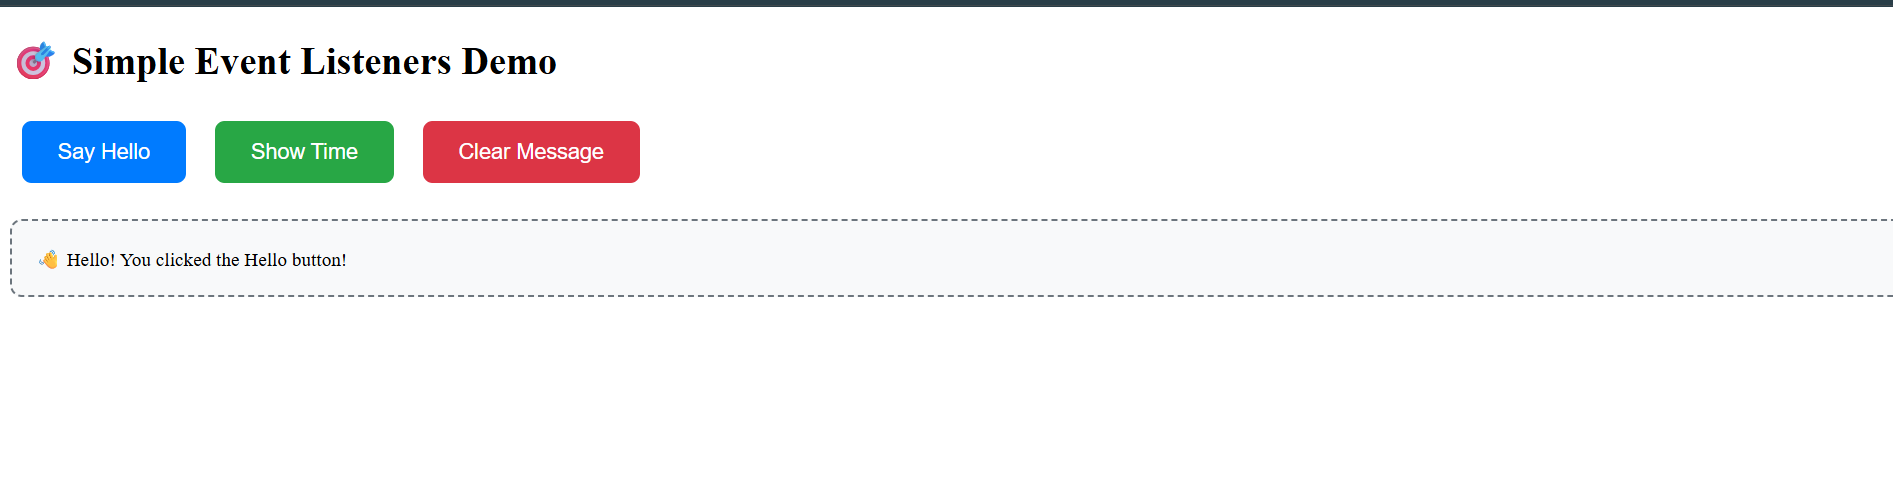
What's happening here?
• addEventListener('click', function() { ... }) - Tells the button what to do when clicked
• Each button has its own function that runs when clicked
• Much better than using onclick in HTML!
🎯 Step 10: Keyboard Events (Simple)
Let's see how to listen for keyboard events:
1
2
3
4
5
6
7
8
9
10
11
12
13
14
15
16
17
18
19
20
21
22
23
24
25
26
27
28
29
30
31
32
33
34
35
36
37
38
39
40
41
42
43
44
45
46
47
48
49
50
51
52
53
54
55
56
<!DOCTYPE html>
<html>
<head>
  <title>Keyboard Events</title>
  <style>
    input {
      font-size: 20px;
      padding: 15px;
      width: 300px;
      border: 3px solid #ddd;
      border-radius: 8px;
    }

    .info-box {
      background-color: #e8f5e8;
      padding: 15px;
      margin: 15px 0;
      border-radius: 8px;
      border-left: 5px solid #4CAF50;
    }
  </style>
</head>
<body>
  <h1>⌨️ Keyboard Event Demo</h1>

  <p>Type in the box below and watch what happens:</p>
  <input type="text" id="typingBox" placeholder="Start typing here...">

  <div id="info" class="info-box">
    Type something to see live updates!
  </div>

  <script>
    // Find the input box and info display
    const typingBox = document.getElementById('typingBox');
    const info = document.getElementById('info');

    // Listen for typing (every time user types a letter)
    typingBox.addEventListener('input', function() {
      const whatUserTyped = typingBox.value;
      const letterCount = whatUserTyped.length;

      info.innerHTML =
        '<strong>You typed:</strong> "' + whatUserTyped + '"<br>' +
        '<strong>Letter count:</strong> ' + letterCount;
    });

    // Listen for Enter key specifically
    typingBox.addEventListener('keypress', function(event) {
      if (event.key === 'Enter') {
        alert('🎉 You pressed Enter! Text: ' + typingBox.value);
      }
    });
  </script>
</body>
</html>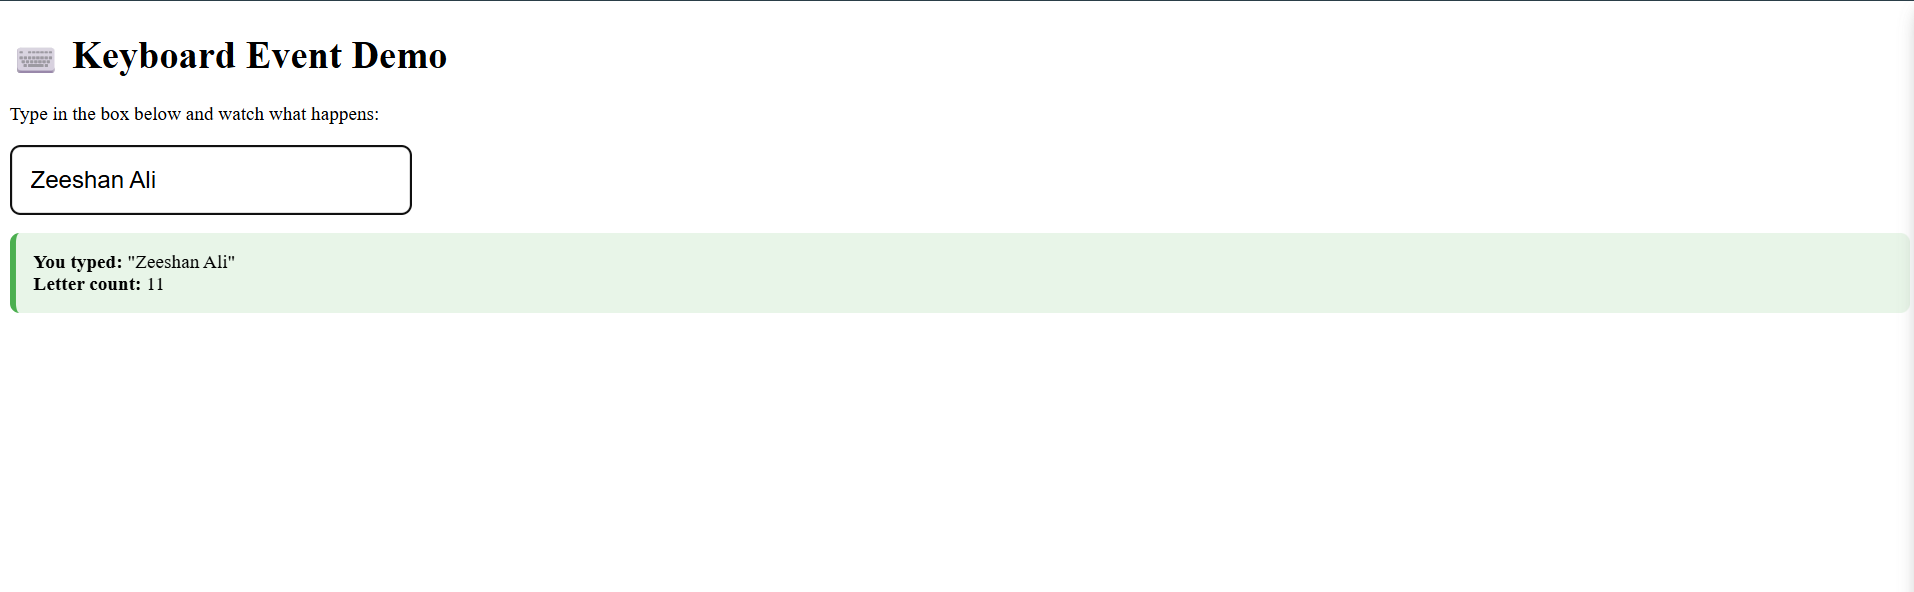
What's new here?
• addEventListener('input', ...) - Runs every time user types something
• event.key === 'Enter' - Checks if user pressed the Enter key
• We can get real-time updates as the user types!
1
2
3
4
5
6
7
8
9
10
11
12
13
14
15
16
17
18
19
20
21
22
23
24
25
26
27
28
29
30
31
32
33
34
35
36
37
38
39
40
41
42
43
44
45
46
47
48
49
50
51
52
53
54
55
56
57
58
59
60
61
62
63
64
65
66
67
68
69
70
71
72
73
74
75
76
77
78
79
80
81
82
83
84
85
86
87
88
89
90
91
92
93
94
95
96
97
98
99
100
101
102
103
104
105
106
107
108
109
110
111
112
113
114
115
116
117
118
119
120
121
122
123
124
125
126
127
128
129
130
131
132
133
134
135
136
137
138
139
140
141
142
143
144
145
146
147
148
149
150
151
152
153
154
155
156
157
158
159
160
161
162
163
164
165
166
167
<!DOCTYPE html>
<html>
<head>
  <title>Event Listeners Demo</title>
  <style>
    .demo-container {
      padding: 20px;
      margin: 10px;
      border: 2px solid #ddd;
      border-radius: 8px;
      background: #f9f9f9;
    }

    button {
      padding: 10px 20px;
      margin: 5px;
      border: none;
      border-radius: 5px;
      cursor: pointer;
    }

    .btn-primary { background-color: #007bff; color: white; }
    .btn-success { background-color: #28a745; color: white; }
    .btn-danger { background-color: #dc3545; color: white; }

    #colorBox {
      width: 200px;
      height: 100px;
      border: 2px solid #333;
      margin: 10px;
      display: flex;
      align-items: center;
      justify-content: center;
      font-weight: bold;
    }
  </style>
</head>
<body>
  <div class="demo-container">
    <h2>🖱️ Event Listener Examples</h2>

    <!-- Click Events -->
    <h3>1. Click Events</h3>
    <button id="clickBtn" class="btn-primary">Click Me!</button>
    <button id="counterBtn" class="btn-success">Count: 0</button>
    <p id="clickOutput">Click the buttons above!</p>

    <!-- Mouse Events -->
    <h3>2. Mouse Events</h3>
    <div id="colorBox" style="background-color: lightgray;">
      Hover over me!
    </div>

    <!-- Keyboard Events -->
    <h3>3. Keyboard Events</h3>
    <input type="text" id="textInput" placeholder="Type something...">
    <p id="keyOutput">Start typing to see keyboard events!</p>

    <!-- Form Events -->
    <h3>4. Form Events</h3>
    <input type="text" id="nameInput" placeholder="Enter your name">
    <p id="formOutput">Focus on the input field!</p>
  </div>

  <script>
    // 1. CLICK EVENTS
    let clickCount = 0;

    // Simple click event
    const clickBtn = document.getElementById('clickBtn');
    const clickOutput = document.getElementById('clickOutput');

    clickBtn.addEventListener('click', function() {
      clickOutput.innerHTML = '🎉 Button was clicked! Time: ' + new Date().toLocaleTimeString();
    });

    // Counter click event
    const counterBtn = document.getElementById('counterBtn');

    counterBtn.addEventListener('click', function() {
      clickCount++;
      counterBtn.textContent = 'Count: ' + clickCount;

      if (clickCount === 5) {
        counterBtn.style.backgroundColor = '#ffc107';
        counterBtn.textContent = '🏆 You did it! Count: ' + clickCount;
      }
    });

    // 2. MOUSE EVENTS
    const colorBox = document.getElementById('colorBox');

    // Mouse enter event
    colorBox.addEventListener('mouseenter', function() {
      colorBox.style.backgroundColor = 'lightblue';
      colorBox.textContent = '😊 Mouse is here!';
    });

    // Mouse leave event
    colorBox.addEventListener('mouseleave', function() {
      colorBox.style.backgroundColor = 'lightgray';
      colorBox.textContent = '😢 Mouse left!';
    });

    // Double click event
    colorBox.addEventListener('dblclick', function() {
      colorBox.style.backgroundColor = 'gold';
      colorBox.textContent = '⭐ Double clicked!';
    });

    // 3. KEYBOARD EVENTS
    const textInput = document.getElementById('textInput');
    const keyOutput = document.getElementById('keyOutput');

    // Key up event (when key is released)
    textInput.addEventListener('keyup', function(event) {
      const typedText = textInput.value;
      const keyPressed = event.key;

      keyOutput.innerHTML = `
        <strong>You typed:</strong> "${typedText}"<br>
        <strong>Last key:</strong> ${keyPressed}<br>
        <strong>Text length:</strong> ${typedText.length} characters
      `;
    });

    // Enter key specific event
    textInput.addEventListener('keypress', function(event) {
      if (event.key === 'Enter') {
        alert('🎯 You pressed Enter! Text: ' + textInput.value);
      }
    });

    // 4. FORM EVENTS
    const nameInput = document.getElementById('nameInput');
    const formOutput = document.getElementById('formOutput');

    // Focus event (when input is clicked/selected)
    nameInput.addEventListener('focus', function() {
      formOutput.innerHTML = '🎯 Input is focused! Start typing your name.';
      nameInput.style.borderColor = '#007bff';
    });

    // Blur event (when input loses focus)
    nameInput.addEventListener('blur', function() {
      const name = nameInput.value.trim();
      if (name) {
        formOutput.innerHTML = '👋 Hello, ' + name + '! Nice to meet you!';
      } else {
        formOutput.innerHTML = '😕 You left the field empty.';
      }
      nameInput.style.borderColor = '#ddd';
    });

    // 5. DOCUMENT-LEVEL EVENTS
    // Page load event
    document.addEventListener('DOMContentLoaded', function() {
      console.log('🚀 Page loaded! All event listeners are ready.');
    });

    // Window resize event
    window.addEventListener('resize', function() {
      console.log('📏 Window resized! New size: ' + window.innerWidth + 'x' + window.innerHeight);
    });
  </script>
</body>
</html>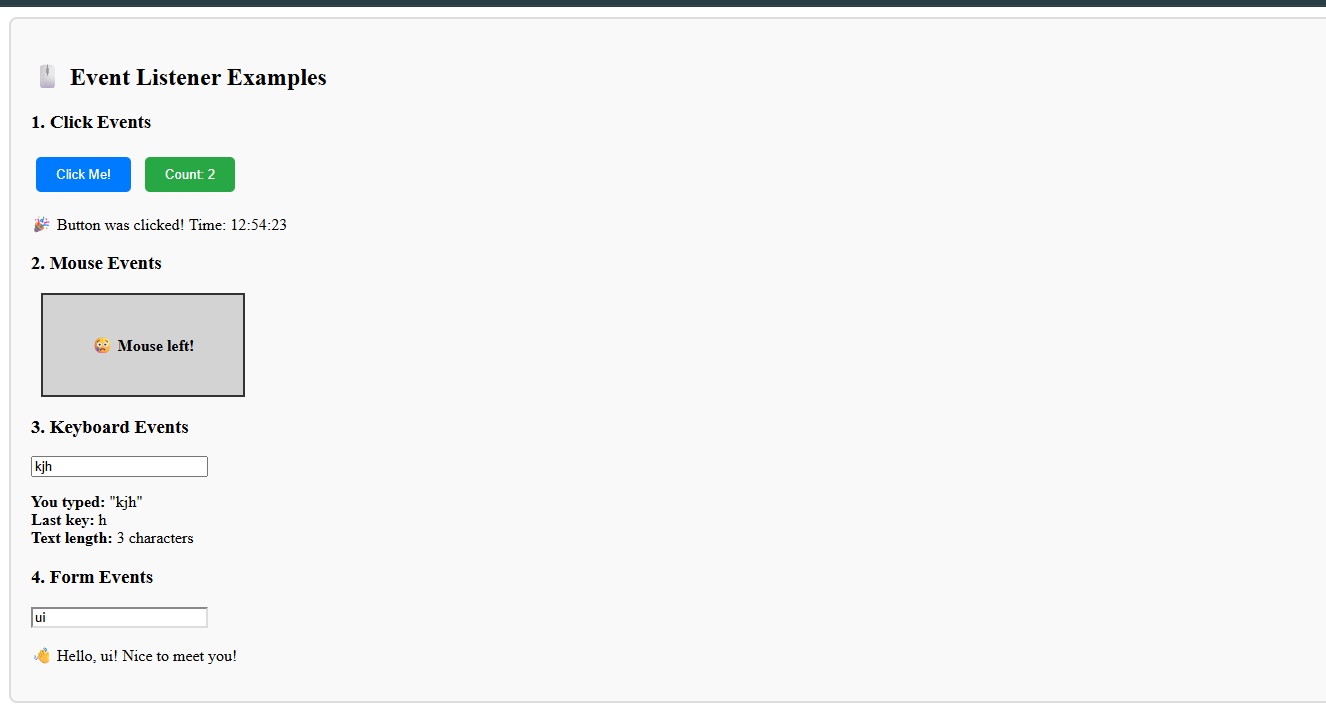
🎯 Final Project: Complete Mini To-Do App
Let's combine EVERYTHING you've learned to build a complete to-do application:
1
2
3
4
5
6
7
8
9
10
11
12
13
14
15
16
17
18
19
20
21
22
23
24
25
26
27
28
29
30
31
32
33
34
35
36
37
38
39
40
41
42
43
44
45
46
47
48
49
50
51
52
53
54
55
56
57
58
59
60
61
62
63
64
65
66
67
68
69
70
71
72
73
74
75
76
77
78
79
80
81
82
83
84
85
86
87
88
89
90
91
92
93
94
95
96
97
98
99
100
101
102
103
104
105
106
107
108
109
110
111
112
113
114
115
116
117
118
119
120
121
122
123
124
125
126
127
128
129
130
131
132
133
134
135
136
137
138
139
140
141
142
143
144
145
146
147
148
149
150
151
152
153
154
155
156
157
158
159
160
161
162
163
164
165
166
167
168
169
170
171
172
173
174
175
176
177
178
179
180
181
182
183
184
185
186
187
188
189
190
191
192
193
194
195
196
197
198
199
200
201
202
203
204
205
206
207
208
209
210
211
212
213
214
215
216
217
218
219
220
221
222
223
224
225
226
227
228
229
230
231
232
233
234
235
236
237
238
239
<!DOCTYPE html>
<html>
<head>
  <title>My Todo App</title>
  <style>
    body {
      font-family: Arial, sans-serif;
      max-width: 600px;
      margin: 50px auto;
      padding: 20px;
      background-color: #f5f5f5;
    }

    .app-container {
      background: white;
      padding: 30px;
      border-radius: 15px;
      box-shadow: 0 4px 10px rgba(0,0,0,0.1);
    }

    .input-section {
      display: flex;
      gap: 10px;
      margin-bottom: 20px;
    }

    #todoInput {
      flex: 1;
      padding: 12px;
      border: 2px solid #ddd;
      border-radius: 8px;
      font-size: 16px;
    }

    #addBtn {
      background-color: #4CAF50;
      color: white;
      padding: 12px 20px;
      border: none;
      border-radius: 8px;
      cursor: pointer;
      font-size: 16px;
    }

    .todo-item {
      background: #f9f9f9;
      padding: 15px;
      margin: 10px 0;
      border-radius: 8px;
      border-left: 4px solid #4CAF50;
      display: flex;
      justify-content: space-between;
      align-items: center;
    }

    .completed {
      text-decoration: line-through;
      opacity: 0.6;
      border-left-color: #ccc;
    }

    .delete-btn {
      background-color: #ff4444;
      color: white;
      border: none;
      padding: 8px 12px;
      border-radius: 5px;
      cursor: pointer;
    }

    .stats {
      background: #e8f5e8;
      padding: 15px;
      border-radius: 8px;
      text-align: center;
      margin-top: 20px;
    }
  </style>
</head>
<body>
  <div class="app-container">
    <h1>📝 My Todo App</h1>
    <p>Add your tasks and check them off when done!</p>

    <!-- Input section -->
    <div class="input-section">
      <input type="text" id="todoInput" placeholder="What do you need to do?" maxlength="100">
      <button id="addBtn" onclick="addTodo()">Add Task</button>
    </div>

    <!-- Where todos will appear -->
    <div id="todoList"></div>

    <!-- Statistics -->
    <div id="stats" class="stats">
      <strong>Total: <span id="totalCount">0</span> | Done: <span id="doneCount">0</span> | Left: <span id="leftCount">0</span></strong>
    </div>

    <!-- Clear all button -->
    <div style="text-align: center; margin-top: 20px;">
      <button onclick="clearAll()" style="background:#ff9800; color:white; border:none; padding:10px 20px; border-radius:8px; cursor:pointer;">
        Clear All Tasks
      </button>
    </div>
  </div>

  <script>
    // Our todo list array - this holds all our tasks
    let todos = [];
    let nextId = 1;

    // Function to add a new todo
    function addTodo() {
      // Step 1: Get what the user typed
      const input = document.getElementById('todoInput');
      const todoText = input.value.trim();

      // Step 2: Check if they typed something
      if (todoText === '') {
        alert('Please enter a task! 😊');
        return;
      }

      // Step 3: Create a new todo object
      const newTodo = {
        id: nextId++,
        text: todoText,
        completed: false,
        createdAt: new Date().toLocaleTimeString()
      };

      // Step 4: Add it to our list
      todos.push(newTodo);

      // Step 5: Clear the input
      input.value = '';

      // Step 6: Update the display
      showAllTodos();
      updateStats();
    }

    // Function to display all todos
    function showAllTodos() {
      const todoList = document.getElementById('todoList');
      todoList.innerHTML = ''; // Clear current display

      // Loop through each todo and create HTML for it
      for (let i = 0; i < todos.length; i++) {
        const todo = todos[i];

        // Create a new div for this todo
        const todoDiv = document.createElement('div');
        todoDiv.className = 'todo-item';

        if (todo.completed) {
          todoDiv.classList.add('completed');
        }

        // Add the content to the div
        todoDiv.innerHTML =
          '<div>' +
            '<strong>' + todo.text + '</strong><br>' +
            '<small>Added: ' + todo.createdAt + '</small>' +
          '</div>' +
          '<div>' +
            '<button onclick="toggleTodo(' + todo.id + ')" style="margin-right:10px; padding:8px 12px; border:none; border-radius:5px; cursor:pointer; background:' + (todo.completed ? '#28a745' : '#007bff') + '; color:white;">' +
              (todo.completed ? '↩️ Undo' : '✅ Done') +
            '</button>' +
            '<button onclick="deleteTodo(' + todo.id + ')" class="delete-btn">🗑️</button>' +
          '</div>';

        // Add this todo to the list
        todoList.appendChild(todoDiv);
      }
    }

    // Function to mark todo as done/undone
    function toggleTodo(todoId) {
      // Find the todo with this ID
      for (let i = 0; i < todos.length; i++) {
        if (todos[i].id === todoId) {
          todos[i].completed = !todos[i].completed;
          break;
        }
      }

      // Update the display
      showAllTodos();
      updateStats();
    }

    // Function to delete a todo
    function deleteTodo(todoId) {
      // Remove the todo with this ID from the array
      todos = todos.filter(todo => todo.id !== todoId);

      // Update the display
      showAllTodos();
      updateStats();
    }

    // Function to update statistics
    function updateStats() {
      const total = todos.length;
      const done = todos.filter(todo => todo.completed).length;
      const left = total - done;

      document.getElementById('totalCount').textContent = total;
      document.getElementById('doneCount').textContent = done;
      document.getElementById('leftCount').textContent = left;
    }

    // Function to clear all todos
    function clearAll() {
      if (todos.length === 0) {
        alert('No tasks to clear! 😊');
        return;
      }

      if (confirm('Are you sure you want to delete all tasks?')) {
        todos = [];
        showAllTodos();
        updateStats();
      }
    }

    // Allow Enter key to add todos
    document.getElementById('todoInput').addEventListener('keypress', function(event) {
      if (event.key === 'Enter') {
        addTodo();
      }
    });

    // Initialize the app
    updateStats();
  </script>
</body>
</html>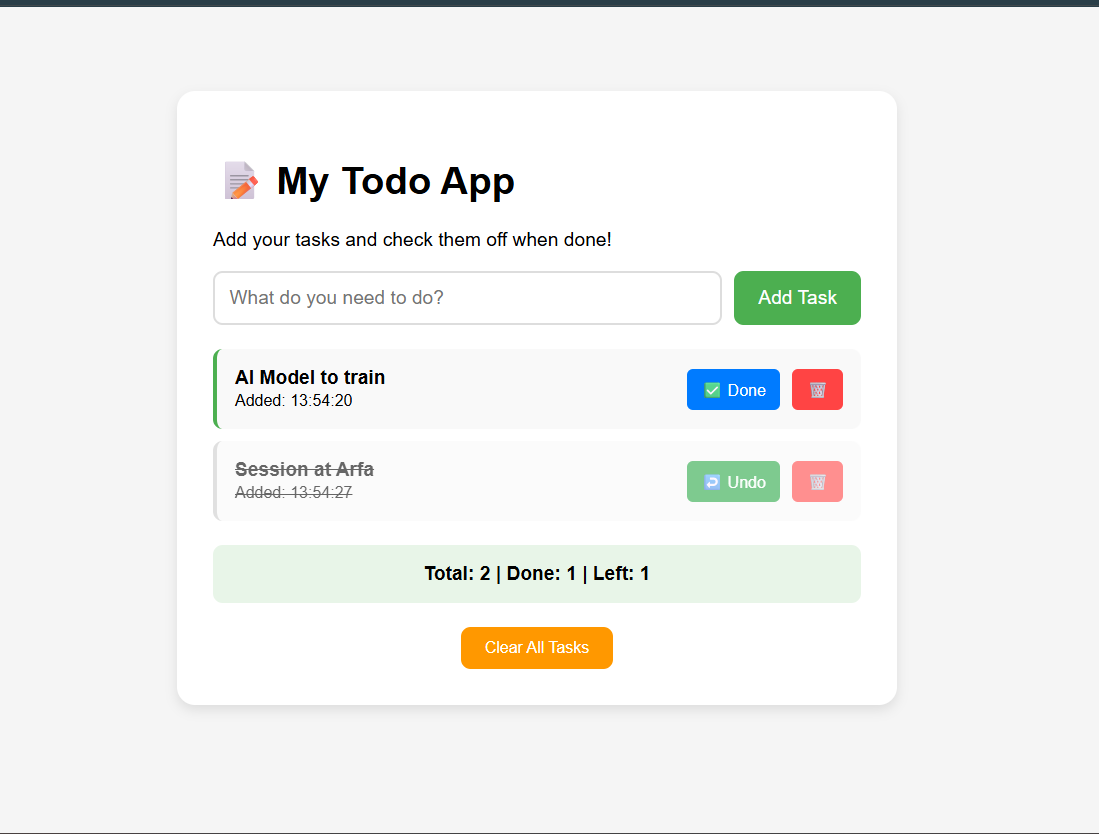
🎊 Amazing! You just built a complete web application!
Everything you used in this project: • Getting user input from text fields • Creating and modifying HTML elements • Event listeners for buttons and keyboard • Working with arrays to store data • Loops to display multiple items • Functions to organize your code • Conditional statements (if/else) • DOM manipulation to update the page
🔥 Key DOM Concepts Summary
Here are the essential DOM concepts every beginner should master:
1
2
3
4
5
6
7
8
9
10
11
12
13
14
15
16
17
18
19
20
21
22
23
24
25
26
27
28
29
30
31
32
33
34
// 1. FINDING ELEMENTS
const element = document.getElementById('myId');           // Find by ID
const elements = document.getElementsByClassName('myClass'); // Find by class
const tags = document.getElementsByTagName('p');           // Find by tag

// 2. READING CONTENT
const text = element.textContent;    // Get text content
const html = element.innerHTML;      // Get HTML content
const value = element.value;         // Get input value

// 3. CHANGING CONTENT
element.textContent = 'New text';    // Change text
element.innerHTML = '<b>Bold!</b>';  // Change HTML
element.value = 'New input value';   // Change input value

// 4. CHANGING STYLES
element.style.color = 'red';         // Change text color
element.style.fontSize = '20px';     // Change size
element.style.display = 'none';      // Hide element
element.style.display = 'block';     // Show element

// 5. CREATING NEW ELEMENTS
const newDiv = document.createElement('div');
newDiv.textContent = 'I am new!';
document.body.appendChild(newDiv);   // Add to page

// 6. EVENT LISTENERS
element.addEventListener('click', function() {
  alert('Clicked!');
});

element.addEventListener('input', function() {
  console.log('User typed:', element.value);
});
⚠️ Common Beginner Mistakes to Avoid
Watch out for these common mistakes when starting with DOM:
1
2
3
4
5
6
7
8
9
10
11
12
13
14
15
16
17
18
19
20
21
22
23
24
25
26
27
// ❌ MISTAKE 1: Not checking if element exists
const element = document.getElementById('missing');
element.textContent = 'Hello'; // ERROR! element is null

// ✅ CORRECT:
const element = document.getElementById('missing');
if (element) {
  element.textContent = 'Hello';
}

// ❌ MISTAKE 2: Trying to access DOM before page loads
console.log(document.getElementById('myButton')); // null

// ✅ CORRECT:
document.addEventListener('DOMContentLoaded', function() {
  console.log(document.getElementById('myButton')); // Works!
});

// ❌ MISTAKE 3: Forgetting to convert strings to numbers
const num1 = document.getElementById('input1').value; // "5" (string)
const num2 = document.getElementById('input2').value; // "3" (string)
const sum = num1 + num2; // "53" (string concatenation)

// ✅ CORRECT:
const num1 = Number(document.getElementById('input1').value); // 5
const num2 = Number(document.getElementById('input2').value); // 3
const sum = num1 + num2; // 8 (actual addition)
🎯 What's Next?
Now that you understand the DOM basics, here's what to learn next:
🚀 Immediate Next Steps: • Practice building more interactive forms • Learn about localStorage to save data • Try building a calculator or simple game • Experiment with CSS animations triggered by JavaScript
📚 Advanced Topics to Explore Later: • API calls to get data from servers • Modern JavaScript frameworks (React, Vue) • Node.js for backend development • Database integration
💡 Practice Challenge for You
Try building these projects to practice your DOM skills:
🎮 Beginner Projects: • Color picker that changes page background • Simple calculator with +, -, ×, ÷ • Digital clock that updates every second • Random quote generator
🚀 Intermediate Projects: • Weather app (using a free API) • Shopping cart with add/remove items • Photo gallery with next/previous buttons • Quiz app with score tracking
🎉 Congratulations!
You've completed the ultimate beginner's guide to DOM! You now know how to:
✅ Find and select HTML elements ✅ Read and change content dynamically ✅ Handle user interactions with events ✅ Create new elements programmatically ✅ Build complete interactive web applications
The DOM is the foundation of interactive web development. Keep practicing with small projects, and soon you'll be building amazing web applications! 🚀
Remember: The best way to learn programming is by building things. Start small, practice regularly, and don't be afraid to experiment!
🚨 Common DOM Mistakes to Avoid
Here are the most common mistakes beginners make with the DOM:
1
2
3
4
5
6
7
8
9
10
11
12
13
14
15
16
17
18
19
20
21
22
23
24
25
26
27
28
29
30
31
32
33
34
35
36
37
38
39
40
41
42
43
44
45
46
47
48
49
50
51
52
53
54
55
56
57
58
59
60
61
// ❌ MISTAKE 1: Not checking if element exists
const element = document.getElementById('nonExistentId');
element.textContent = 'Hello'; // Error! element is null

// ✅ CORRECT WAY:
const element = document.getElementById('myId');
if (element) {
  element.textContent = 'Hello';
} else {
  console.log('Element not found');
}

// ❌ MISTAKE 2: Trying to access DOM before it's loaded
console.log(document.getElementById('myButton')); // null (if script runs before HTML is parsed)

// ✅ CORRECT WAY:
document.addEventListener('DOMContentLoaded', function() {
  console.log(document.getElementById('myButton')); // Works!
});

// ❌ MISTAKE 3: Using innerHTML with user input (security risk)
const userInput = prompt('Enter your name:');
document.body.innerHTML = '<h1>Hello ' + userInput + '</h1>'; // XSS vulnerability!

// ✅ CORRECT WAY:
const userInput = prompt('Enter your name:');
const heading = document.createElement('h1');
heading.textContent = 'Hello ' + userInput; // Safe from XSS
document.body.appendChild(heading);

// ❌ MISTAKE 4: Not removing event listeners
function addTempListener() {
  const button = document.getElementById('myButton');
  button.addEventListener('click', tempHandler);
  // Memory leak if not removed!
}

// ✅ CORRECT WAY:
function addTempListener() {
  const button = document.getElementById('myButton');
  button.addEventListener('click', tempHandler);

  // Remove when no longer needed
  setTimeout(() => {
    button.removeEventListener('click', tempHandler);
  }, 10000);
}

// ❌ MISTAKE 5: Modifying CSS properties that cause layout thrashing
function animateBadly() {
  const element = document.getElementById('box');
  for (let i = 0; i < 100; i++) {
    element.style.left = i + 'px'; // Causes layout recalculation each time!
  }
}

// ✅ CORRECT WAY:
function animateWell() {
  const element = document.getElementById('box');
  element.style.transform = 'translateX(100px)'; // Uses GPU, no layout recalculation
}
💡 Best Practices for DOM Manipulation
Follow these best practices for efficient DOM manipulation:
1
2
3
4
5
6
7
8
9
10
11
12
13
14
15
16
17
18
19
20
21
22
23
24
25
26
27
28
29
30
31
32
33
34
35
36
37
38
39
40
41
42
43
44
45
46
47
48
49
50
51
52
53
54
55
56
57
// ✅ 1. Cache DOM elements when using them multiple times
const button = document.getElementById('myButton');
const output = document.getElementById('output');

button.addEventListener('click', () => {
  output.textContent = 'Button clicked!';
  output.style.color = 'green';
  output.classList.add('highlighted');
});

// ✅ 2. Use document fragments for multiple DOM insertions
function addMultipleElements() {
  const fragment = document.createDocumentFragment();

  for (let i = 0; i < 100; i++) {
    const div = document.createElement('div');
    div.textContent = 'Item ' + i;
    fragment.appendChild(div); // Add to fragment (in memory)
  }

  document.body.appendChild(fragment); // Single DOM insertion
}

// ✅ 3. Use event delegation for dynamic content
// Instead of adding listener to each item
document.getElementById('container').addEventListener('click', function(event) {
  if (event.target.classList.contains('dynamic-button')) {
    console.log('Dynamic button clicked:', event.target.textContent);
  }
});

// ✅ 4. Batch style changes
function updateStyles(element) {
  // Instead of changing one by one (causes multiple repaints)
  // element.style.color = 'red';
  // element.style.fontSize = '20px';
  // element.style.padding = '10px';

  // Use cssText for multiple changes
  element.style.cssText = 'color: red; font-size: 20px; padding: 10px;';

  // Or use classes
  element.className = 'updated-style';
}

// ✅ 5. Use modern methods
// Modern way to select elements
const elements = document.querySelectorAll('.item');

// Modern way to iterate
elements.forEach(element => {
  element.addEventListener('click', handleClick);
});

// Modern way to check if element exists
const element = document.querySelector('#myId');
element?.classList.add('active'); // Only runs if element exists
🎯 Quick Reference Guide
Here's a handy reference for the most commonly used DOM methods:
1
2
3
4
5
6
7
8
9
10
11
12
13
14
15
16
17
18
19
20
21
22
23
24
25
26
27
28
29
30
31
32
33
34
35
36
37
38
39
40
41
42
43
44
45
46
47
48
49
50
51
// 🔍 SELECTING ELEMENTS
document.getElementById('id')              // Select by ID
document.querySelector('.class')           // Select first match
document.querySelectorAll('tag')          // Select all matches
document.getElementsByClassName('class')   // Select by class (live collection)
document.getElementsByTagName('tag')       // Select by tag (live collection)

// 📝 CHANGING CONTENT
element.textContent = 'text'              // Change text only
element.innerHTML = '<b>HTML</b>'         // Change HTML content
element.setAttribute('attr', 'value')    // Set attribute
element.getAttribute('attr')              // Get attribute value
element.removeAttribute('attr')           // Remove attribute

// 🎨 STYLING
element.style.property = 'value'          // Inline styles
element.style.cssText = 'prop: value;'   // Multiple inline styles
element.classList.add('class')           // Add CSS class
element.classList.remove('class')        // Remove CSS class
element.classList.toggle('class')        // Toggle CSS class
element.classList.contains('class')      // Check if has class

// 🏗️ CREATING & MODIFYING STRUCTURE
document.createElement('tag')             // Create new element
element.appendChild(child)                // Add child to end
element.insertBefore(new, existing)      // Insert before specific child
element.removeChild(child)                // Remove child
element.remove()                          // Remove element (modern)
element.cloneNode(true)                   // Clone element (true = deep clone)

// 🖱️ EVENTS
element.addEventListener('event', handler) // Add event listener
element.removeEventListener('event', handler) // Remove event listener
event.preventDefault()                     // Prevent default behavior
event.stopPropagation()                   // Stop event bubbling

// 📐 MEASUREMENTS & POSITION
element.offsetWidth                       // Element width including padding/border
element.offsetHeight                      // Element height including padding/border
element.clientWidth                       // Element width excluding border
element.clientHeight                      // Element height excluding border
element.scrollTop                         // Scroll position
element.getBoundingClientRect()          // Position relative to viewport

// 🔄 NAVIGATION
element.parentNode                        // Parent element
element.children                          // Child elements
element.firstElementChild               // First child element
element.lastElementChild                // Last child element
element.nextElementSibling              // Next sibling element
element.previousElementSibling          // Previous sibling element
🚀 Next Steps and Learning Path
Now that you understand the DOM basics, here's what you should learn next:
Beginner Level (You Are Here!): ✅ Basic element selection and manipulation ✅ Event handling ✅ Creating and removing elements ✅ Form validation
Intermediate Level: 🎯 AJAX and Fetch API for dynamic content 🎯 Working with forms and form data 🎯 Local Storage and Session Storage 🎯 CSS animations triggered by JavaScript
Advanced Level: 🚀 Virtual DOM concepts (React, Vue) 🚀 Performance optimization 🚀 Web Components and Shadow DOM 🚀 Progressive Web Apps (PWAs)
🎯 Summary
Congratulations! You've learned the fundamentals of DOM manipulation with practical examples:
• What is DOM - A live blueprint of your webpage that JavaScript can modify • DOM Tree Structure - How HTML elements form a family tree • Simple Examples - Getting values from HTML elements • Percentage Calculator - Real-world application with input validation • Event Listeners - Making your webpage interactive (clicks, keyboard, mouse) • Selectors - Finding elements by ID, class, tag, attributes, and position • Value Changes - Modifying content, forms, and HTML dynamically
🚀 Next Steps
Now you have the foundation! Try building: • Todo List App - Add, delete, and mark tasks complete • Quiz Application - Show questions and calculate scores • Image Gallery - Change images on button clicks • Form Validator - Check if inputs are correct before submission • Shopping Cart - Add items and calculate totals
The DOM is your gateway to creating interactive websites. Keep practicing with these examples, and you'll be building amazing web applications in no time! Happy coding! 🎉👨💻👩💻